For a couple days I've been trying different approaches to making the mouthpiece for the black Every Whistle. It's not a case of how to make one, but rather how to make them in production mode. The more uniform the better, and the quicker the better.
I had made one whistle by simply splitting a section of pipe and slipping it over the head. This worked, but the pipe didn't really want to stay round when spread that much. It would go a little oval, and impact the windway height.
I was thinking of trying some heat to relax the plastic after splitting it to see if it came into a round section easily. Jem mentioned that the plastic can be expanded enough to fit over it's original OD with heat on a mandrel. So I bought a heat gun and had a go at several approaches.
Two mandrels
The first mandrel was made from aluminum bar and looked really nice all polished up to eliminate extra friction. The problem was, aluminum conducts heat really well, and the mouthpiece would cool as it was pushed over the mandrel, requiring heating one or two more times. The good news is the aluminum doesn't have a high specific heat, so it warmed up quickly and things worked pretty well once the mandrel was warm. I considered, and am still keeping on the back burner, fitting the mandrel to a heat source such as a soldering iron. It could be threaded on in place of the soldering tips. But that might be more work than it's worth.
I thought a Delrin mandrel might work better, leaving more heat in the mouthpiece. So I made one out of Delrin, and it did work a better. Good enough that it shouldn't be too hateful to make a couple dozen at a time. But it also worked nicely to split the mouthpiece and heat it on a mandrel to shape it for the whistle.
While I was trying different techniques to make the mouthpiece, I was trying different ways of finishing the whistles.
Here are three whistles with different treatment of the logo. The left one is painted with cream paint that matches the color of the CPVC I have locally. The middle one is simulating a gray paint. It is really polishing compound left in the engraved logo. The right one is as it comes from the engraver with no treatment by me at all.
Here is a more distant view of the whistles. The one in the middle was treated with sandpaper and steel wool while on the lathe to make a brushed finish going around the whistle. It reminds me of uni-directional carbon fiber or fiber glass. Not bad looking. Lighter than the native black color. The one on the right is a white color, and no logo in on that whistle because it is the original prototype.
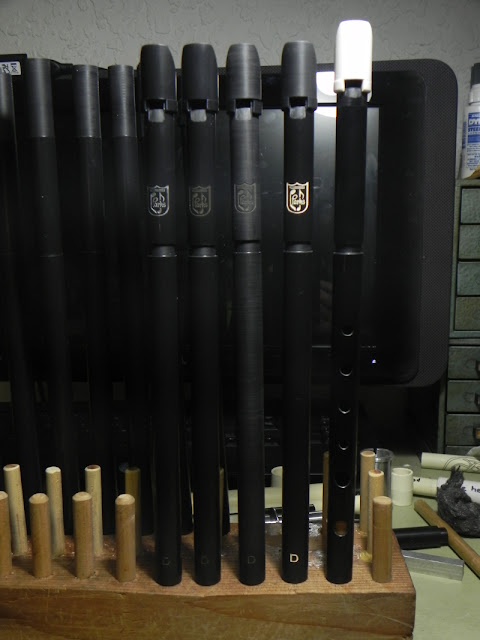
Here's a long view of the various color and mouthpiece options.
Here you can see the second from the left has the split mouthpiece treatment.
They all play alike, so it's down to how it looks and how easy is it to make over and over again.
I think I'll take some time out from the mouthpiece R&D to lay out the finger holes and make playable whistles out of the ones made so far.
I think I'll take some time out from the mouthpiece R&D to lay out the finger holes and make playable whistles out of the ones made so far.


